
In the past 13 years, I have had one blog or another. Most were small and personal endeavors, some were just for learning something new, Techie Mamma was born 3 years ago and became my blog baby. Techie Mamma has been teaching about blogging to thousands of users around the globe and we want to help you start a blog and live a boss free life.
The reason for starting a blog could be a combination of one or many of these:
- Sharing a passion
- Passive income
- Sharing your knowledge
- Money – Passive Income
- Social impact
- Documenting thoughts or travels
Or many other reasons. Each reason will be unique to you.
Here are some questions that you might be asking yourself when thinking of starting a blog:
- What system should I use for my blog? (Blogging Platform)
- What will my blog niche be? (Blog topic)
- What should my name be?
- How do I buy a domain name?
- Where should I host my blog?
- How do I buy hosting?
- How do I install my blog on my host or system … I give up it is too much!
- What should my blog look like?
- How do I write on my blog and how much should I write before I share it with the world?
In this guide, you will find answers to all these questions and by the time you finish the guide (if you follow along), you will have a finished blog!
So grab a cup of coffee and let’s get started.
Here are the basic steps to start a blog:
- Picking your niche
- Selecting a blog platform
- Picking a domain name & hosting for your blog
- Install / Access WordPress on your host
- Choose a design and theme for your blog
- Install the best WordPress plugins
- Write your first blog post
- Share your write up with the world
- Monetize your blog
- Drive traffic and gain more exposure
Note: In order to make it easier to follow along, I’m only suggesting my most recommended platform and hosting. There are many options and I will point to other options that I have reviewed in the guide.
How To Start A Blog From Scratch when you are a total Newbie
In just minutes you will have your blog up and running. This guide is broken down and designed for users who are just starting out and know little or nothing about blogging.
Step 1: Picking your Blog Topic or Niche
If you want to take things slower, there are many things you can do before you go through this whole guide. Some overlap but these 5 Steps Before Starting a Website will help you choose some of these items. After all, a blog is just a website and there are many things that you will find in common.
One of the first things you need to do that will guide the rest of the process is picking your niche or your main blogging topics. These may change over time and you may have at first something open-ended like parenting or lifestyle. Usually the more specific you can be the better so the competition is not as great. Writing about too many topics will make it hard for Google to rank you the authority on that topic.
It may take time though. Techie Mamma started as more of a parenting blog and journal and this year we have really nailed down the topic of Mompreneur. That means there are two main topics. Business and Mommying. In the coming years, Techie Mamma will emerge as the authority being a Mompreneur.
Check out the Discovery Niche Worksheet to help get you organized and picking a topic that you are passionate about.
As someone who has started many blogs but only has one that has survived and flourished, I can say this is an important step. It will ensure that you will not burn out quickly and that you can continue to be passionate about it years to come.
Step 2: Select the Blogging Platform
Mull over the idea of the niche, fill out the worksheet and spend some time on this step before moving forward. Your blogging platform is the system that will be running your blog. Just like many things in tech, there are many platforms and various advantages and disadvantages to all of them.
Some popular ones today include WordPress (this tutorial will focus on WordPress), Blogger, Squarespace, and Wix.
If you spend some time on my site, you can see that I am an avid WordPress user. WordPress powers 33% of the web and is one of the most popular blogging platforms. In some cases, it is harder to get started with but in the long run, you will not regret your decision when you learn you can do so much more than just your blog.
A friend of mine moved from blogger to WordPress and is much happier. Another friend moved from Squarespace to WordPress and is now selling her packages and items.
Another limitation with these other platforms is the proprietary nature where you are not open to using the hosting you like. On blogger, Google is your host. On Squarespace, you purchase everything via Squarespace. With WordPress, if one thing is not working out you can move on to another host and get better support, speed, security, etc.
One quick tangent, WordPress also has an option of its own hosting. It is called WordPress.com. If you are wary of all the steps below starting with WordPress.com is a great way to get started and stick in the WordPress ecosystem. You will not have all the options but once you are ready to move to your own hosting it will be a lot easier than moving from Squarespace or Blogger or Wix.
What is the difference between WordPress.org and WordPress.com? It can be confusing this infographic explains more.
There are a lot of different options here and there are merits to all of them. Ultimately going with a self-hosted WordPress blog will provide you with the most flexibility in the future.
Step 3: Pick a Blog name & domain name for your blog
Domain Name for your Blog
Your blog name and your domain name is going to be your identity when it comes to your blog and therefore is super important for your success. You want something that is catchy but also that is unique enough so you are not copying a competitor and can register on social media as well.
Key Tips for Your Domain Name:
- Easy to remember
- Easy to type
- Easy to pronounce.
Your domain is like your street address. It has a main part and then an extension (think street name and number). For example, techiemamma.com. There are many extensions these days (.com in my domain) so you can be creative. Check out techiemamma.shop or techiemamma.live these are all extensions you can claim. It does not have to be a .com to be successful.
A custom domain name is like techiemamma.com, costs about $12/year.
There are several domain registrants I recommend. I register most of my domains via Google Domains, but I also recommend I want my Name and NameCheap. There is also the option, with most hosts, to register your domain where you host, keeping it simple and the two purchases together.
Some hosting companies, like Bluehost, will add in a free domain with the purchase of your hosting package. This is a great way to get started so you don’t have the added expense in your first year of blogging. Even if companies offer free domains to get a really great domain that you will use forever might cost a bit more.
Hosting for your Blog
Once you have your address (think street address), you need some kind of structure at that address. This is your hosting. Your platform or the type of structure maybe be WordPress (like outlined in this tutorial) or some other platform. Where everything is stored (inside the structure) is your host or your server. Your host is going to store your files and database for your blog.
Your hosting is one of the most important things you will purchase for this journey (besides your address) because depending on the structure you will have speed, more storage and bandwidth, security and many other things that are important. You want your host to have 24/7 uptime as well so no matter when or where your visitors can reach your blog.
Hosting can range in price but for the most part, they are cheap. My recommended hosting is about $12 / month. If you find yourself on a super budget you can get good hosting for about $5 / month.
If you want to research your options choose a host that has the following features:
- Free SSL
- 40+ GB of monthly bandwidth
- 20+ GB of storage space
- Easy to use control panel
- Easy to contact premium support
- A money-back guarantee
- Optional: Free email with your domain
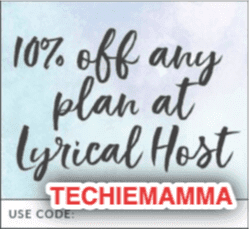
There are plenty of hosting service providers out there, but for your blog, if you can choose Lyrical Host. In addition to all of the above, they offer amazing plans, WordPress pre-installed, and have monthly resources that are invaluable including free stock photography. You can also register your domain so you can take care of both in one place.

The cool part?!
Once you are done buying hosting + domain name, Lyrical Host has WordPress pre-installed. So you will be all set!
Step 4: Set up your blog
One of the best things about Lyrical Host is that once you get your hosting purchased and connected with your domain the rest is all ready to go. They have WordPress installed and ready so you don’t have to mess with the installation. There are some settings and the Dashboard you should be familiar with. These tutorials will take you through those options.
Step 5: Design your WordPress blog
- Blogging platform? Check!
- Blog niche? Check!
- Domain name? Check!
When it comes to visitors and your website, you want to make a good first impression. If the site is slow or the design is not pleasing, visitors will leave right away. The content will keep visitors coming back but the first impression is design and speed.
WordPress has themes that are starting places for your design. There are themes that are very specific to a particular audience or type of sites like wedding themes and many that are more flexible. I recommend using a theme that is flexible and can grow with your blog and needs.
Recommendations on WordPress themes:
- Choose a theme that is flexible and modern
- Choose a page builder to do complex layouts
- Check out Astra Theme with Astra Starter Sites
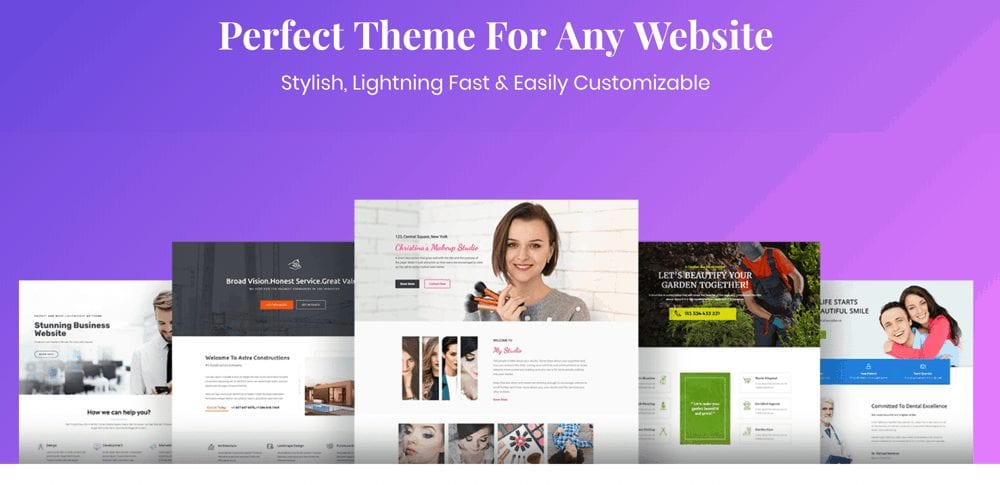
As of the time of this writing, one of my favorite themes to get started is Astra with the Elementor page builder. The Astra theme is a lightweight fast theme with a lot of options to get a style to match your blog. With the Astra Starter Sites, you can import ready-made content and template and have something set up in minutes.
Step 6: Extend Functionality with WordPress Plugins
Just like themes, there are thousands of WordPress plugins that help extend functionality. At the very least you need some plugins for security, forms, SEO, and image optimization. There are many options for this. JetPack by WordPress.com offers some great resources and tools. JetPack also allows you to use a mobile app to write on the go!

Here are plugins which you should have on your newly created WordPress blog:
- SmartCrawl SEO
- Defender Security
- Smush Image Optimization
- Forminator Forms
- Bonus: JetPack by WordPress.com
You can find a list of best WordPress plugins here.
Step 7: Plan your content
- Blogging platform? Check!
- Blog niche? Check!
- Domain name? Check!
- Blog theme? Check!
- Plugins? Check!
Content is the thing you will be working on over and over on your site. It is important to have a plan, have goals and organization for your content. You need to start with your first blog post, but you will want several planned so you can get a schedule going.
How you do this is up to you. Many like to use Trello or Excel or Google Sheets. I personally like ClickUp for my content plan. There are many options. However, you choose to organize take a look at the calendar and plan a consistent schedule. That can be twice a week, daily, once a week, monthly or so on. Also, make note of any holidays you might want to incorporate into your schedules such as Christmas or Easter.
This is a free Trello content planning board that you can use. It has a checklist that you can go through for each blog post.

For that first piece of content, cover all topics of your blog. Introduce other things that you might be featuring (this is where having a content plan will help) and be informal in your writing. You may want to embed a YouTube video or other rich content. Embed images but don’t just take them from the web, use free resources available with the Creative Commons license to get images and other media for your site.
Adding important pages on your blog
Besides your blog pages, you might want to add some pages to your menu for your visitors to get to know you better. Here are some that you might want to add from the beginning.
- An About page has information about your blog and you as a person. This is important so your visitors can feel like they know you better.
- A Contact page allows your visitors to get in contact with you. Having an easy way to contact you without sharing your email is best to avoid spam. You can use Forminator mentioned above to set up a contact form.
- A Media kit page might not be a necessity on day one but as you gain popularity and start reaching out to do sponsored posts, etc. it will be essential. This is where you will write about your blog traffic and available advertising options.
Step 8: Sharing Your Blog With the World
Once you have written your first blog post and have a bit of content on your blog you will want to share your blog post with the world and get some traffic to your site. For the most part, unless your blog is purely a hobby and personal, you will want traffic to drive income and more opportunities. One of the easiest ways to drive traffic is to make your blog social and post on social media. You do not need every social media platform. Decide where you want to spend your time with social media and open an account for that platform. Remember to keep the name on the social media platform the same or very close to your blog name.
For the best tips on how to Socialize Your site check out this guide with the best resources.
Step 9: Driving More Traffic to your Blog
Now that your first post is live, you have shared on social media. The key will be driving more traffic to your blog and gaining loyal followers and readers. There are many ways to drive traffic. A big focus is building your community via social media. You will also want to start an email list and form a community via email. Lastly, solid SEO on-page and site-wide will be key for ongoing traffic.
Step 10: Make Money Blogging
One of your biggest goals for your blog may be to make some passive income. There are many ways to do this, start with one and grow slowly by selecting two or three that might work for you.
Here are some popular options:
- Google AdSense
- Media.net
- Affiliate marketing
- Sponsored content (Get paid for writing about others)
- Amazon affiliate program
- Direct ad sales
- Own digital products like eBooks, Online course
Starting a Blog FAQ
How do beginner blogs make money?
There are many ad networks such as Google AdSense, Media.net and affiliate marketing that can help you get started making money.
How many posts should you post monthly?
Google likes consistency when it comes to posting content. Decide on a schedule and stick to it. Some very successful blogs post once a month others post daily. If you are just starting out and don’t have much content, posting more often to increase content will help in the beginning.
Welcome to the world of Blogging!
This guide is extensive but does not cover everything! Sign up for my newsletter to get tips and tricks regularly on how to get more traffic, build your email list, get the most of your WordPress site and more. In the meantime, if you have any questions before starting your blog, feel free to send it to us via comment.
Do share this start a blog guide with others who want to create a blog and help them get started!


 BY TECHIE MAMMA